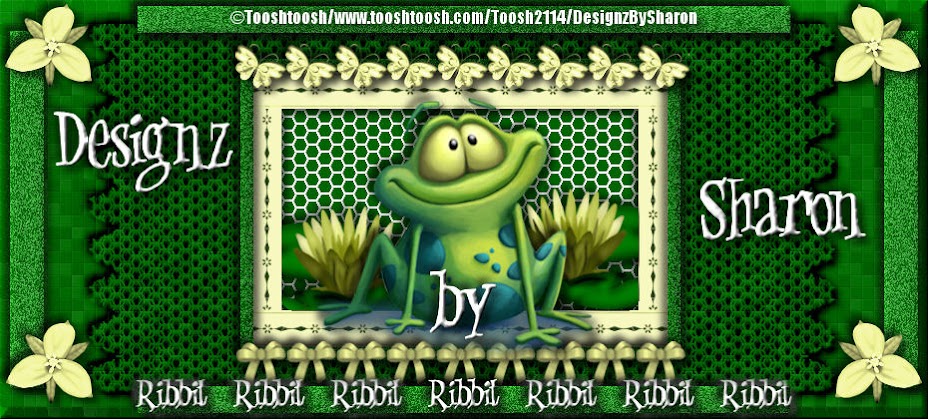
Click for larger view
This tutorial was written by Sharon A on Apr 4, 2012 & is copyright protected
For more info read my TOU
Supplies Needed
Forum Template # 58 by me here
Plugins
Xero Fritillary
DSB Flux Bright Noise
Graphics Plus Cross Shadow
Eyecandy 4 HSB Noise
The tube I used Green Eyes is by Majestik Art, you can purchase this tube from MTA here
The name of my font is Franklin Cascaes
I used size 60 for my text & 72 for my name
Open your template, shift D to duplicate & close original
Delete credit layer
Floodfill your bg layer with a color from your tube
Apply xero fritillary changing the top & bottom #'s to 12
Apply dsb flux bright noise intensity 30, mix checked
Apply graphics plus cross shadow changing the 2 bottom #'s to 100
Floodfill your border layer with a brighter shade of your color
Add inner bevel
Activate one of your # 3 squares
Select all>float>defloat
Paste your tube as a new layer
Resize as needed & position into place
Invert your selection
Delete & deselect
Add drop shadow
Duplicate & mirror
Move the duplicated tube layer to above the opposite square # 3 layer
Activate left square #3
Floodfill with your first color
Add texture>grass>scale 30>depth 3
Add drop shadow
Repeate on the right square #3
Floodfill your #2 squares with your border color
Add drop shadow
Floodfill your #1 squares with a pastel shade of your color
Add texture>fine canvas>scale 50>depth 3
Add drop shadow
Floodfill your rectangle layer with your pastel color
Apply texture>paper standard>scale 50>depth 1
Floodfill your flower layers
Add inner bevel & drop shadow
Change the layer properties on your lace to luminance legacy
Duplicate 2 times
Apply eyecandy hsb noise using default settings, patter smooth fractal
Repeat on other 2 layers clicking the random seed button each time
Resize all layers to 70%
Add your text, name & © info
Animation:
Hide animation 2 & 3
Merge visible
Copy & paste into animation shop
Undo your merge
Hide animation 1 & unhide #2
Merge & paste after current in animation shop
Undo your merge
Hide animation 2 & unhide #3
Merge visible & paste after current in animation shop
View your animation
Save as gif & you're all done!
I hope you enjoyed my tutorial
Your comments are very much appreciated either here on this post or on the chat box. I've made it easy for you to post on this tut by turning off the requirement of having to type in a confirmation code
I would love to post your © compliant result, just emaail it to me with ATT Sharon & the tut name in the subject line
You'll find my email blinkie on your left
:)
Result by Kaye W


Thanks for the nice tut.
ReplyDelete